

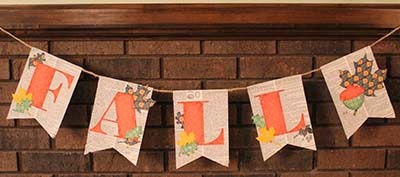
Dress up a door way or mantle with a seasonal banner proclaiming that autumn has arrived. Pair old dictionary pages with your favorite seasonal papers to create an upcycled project for your fall decor. Designer Dawn shows you how.
Designed by: Dawn Mercedes Barrett
Time: 60 minutes
Level: Intermediate – Advanced
Size: Pennants: 8.25 x 5.5 inches; 40 inches long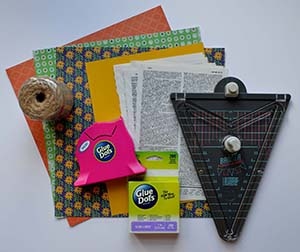
Time: 60 minutes
Level: Intermediate – Advanced
Size: Pennants: 8.25 x 5.5 inches; 40 inches long
Here's what you need:
- Glue Lines®
- Mini Glue Dots®
- Craft Glue Dots®
- DCWV Fiesta Forever Stack
- Coordinating cardstock as needed
- Book or Dictionary pages
- Pearls, bling and other embellishments as desired
- Colored ink pads to match paper
- Daubers

- Jute cord
- Paper Trimmer
- Electric die cutter
- Dies or SVG files for letters and leafs
- Banner Punch Board
- Ruler
- Score board
Here's what you do:
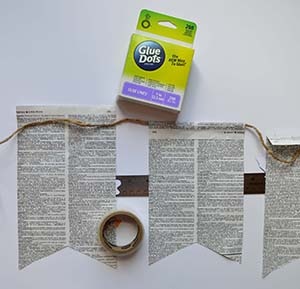
- Trim your old book or dictionary pages to 5.5" x 9.25". Use the banner punch board to create five flag shaped banners. Score 1 inch down from the top using a score board.
- Using your electronic die cutter, cut out large letters from the DCWV paper stack to spell out the word: FALL. Each letter is approximately 4.75" high.
- Using your electronic cutter with dies or SVG files, cut leaves in various sizes and a large acorn. Sponge colored ink on the edges of each paper piece and let dry.
- Lay out the letters and leaves in front of you to ensure proper spacing. Once satisfied with the layout, use Glue Lines and Craft Glue Dots to adhere the paper pieces to the flags. Use Mini Glue Dots to secure corners or small paper areas.
- Flip flags over and reverse the order of the letters so that the F is on the right side. Place 3 Glue Lines along the top edge of the flag and 3 Glue Lines just under the score line. Start with the center flag to ensure proper spacing. Lay the jute cord just above the fold, and fold the top edge down. Burnish the seal. Use a ruler to make
 a 2" space between flags. Then, add the next flag and so on until you have secured all five flags on the jute cord.
 - Flip your banner back to the front and add other embellishments as desired. Hang and enjoy!
~Dawn
No comments:
Post a Comment