Who knew putting Glue Dots and wrapped candy together would create a cute sweet treat? Designer Dawn did and she shows you how to make a chocolate candy mouse with Glue Dots and a few embellishments.
Made by: Dawn Mercedes Barrett
Time: 15 minutes
Level: Beginner
Size: 3" x 3.5"
Time: 15 minutes
Level: Beginner
Size: 3" x 3.5"
One way to show others we care about them is to make hand-made gifts. This sweet craft is a cute valentine for kids or adults to share with each other!
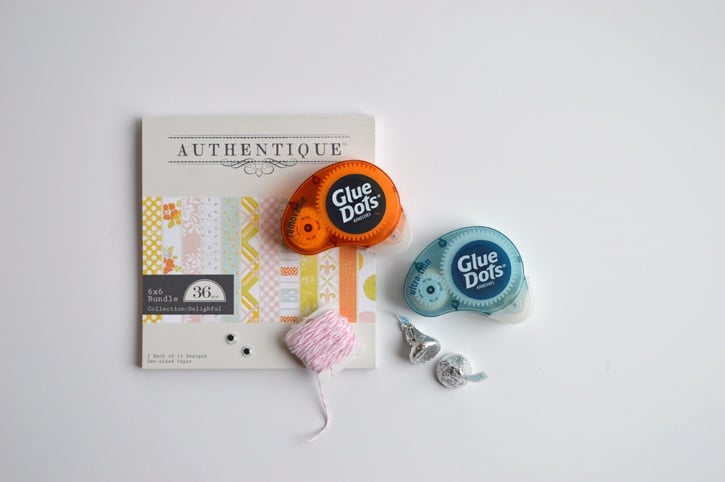
Here's what you need:
- Ultra-Thin Glue Dots®
- Mini Glue Dots®
- Removable Glue Dots®
- Patterned Paper (Authentique: Delightful Collection)
- Valentine Sentiment Stamp
- Memento Black Ink
- 2 small googlie eyes
- 2 Hershey Kisses®
- 3" pink/white baker's twine
- Spellbinders Nestabilities Hearts and Scalloped Hearts
- Sizzix BigShot
- 1/2 circle punch
- Scissors
- Ruler

Here's what you do:
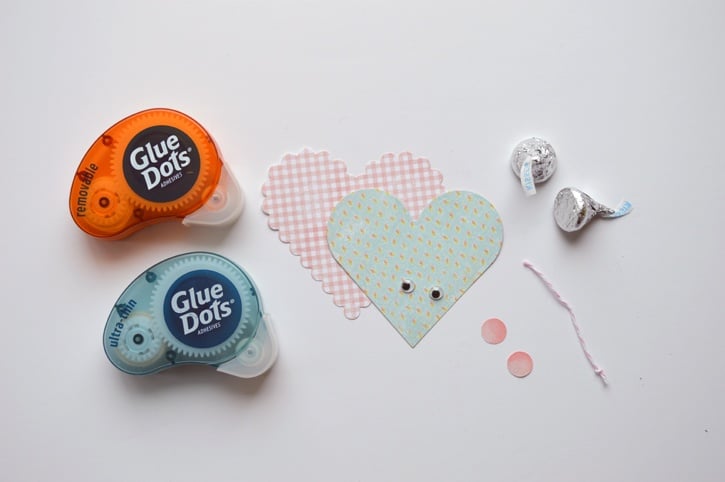
Select the two coordinating papers from your paper collection. Cut out a 3.5 " scallop heart using Spellbinders' Nestabilities: Scalloped Heart die. Cut out a 3.25 " heart using Spellbinders' Nestabilities Heart die.
Punch out two 1/2" circles using a circle punch. Tip: Use daubers and pink ink to sponge a little color to the edges of the circles. This will give your mouse ears a little definition and interest.
Tie a knot at the end of the pink baker's twine. Cut off a length of twine that is about 3" long.

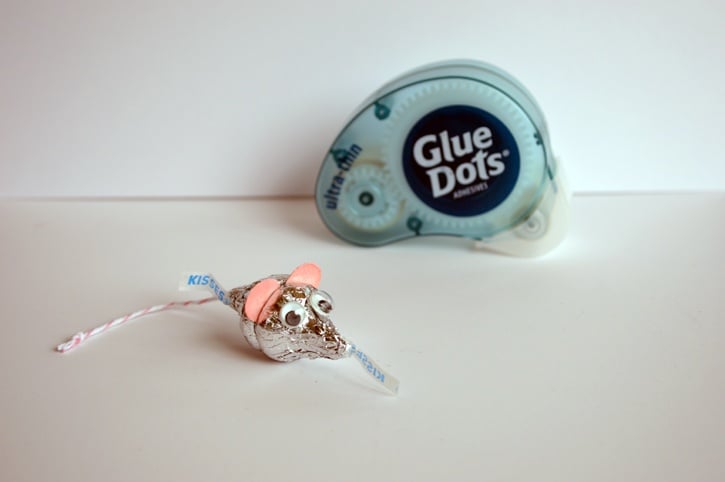
Apply 3 Ultra-Thin Glue Dots to the base of one of the chocolates. Add the ears and then stick the second chocolate, base to base, to form a mouse shape. Use Mini Glue Dots to add the googlie eyes and baker's twine tail.

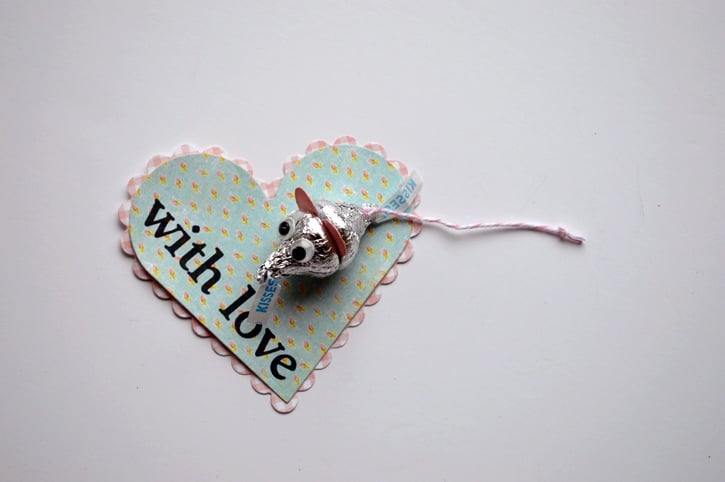
Stamp a valentine sentiment on half the heart using Memento black ink. Use Ultra-Thin Glue Dots to layer the 2 hearts on top of each other. Tip: This is a good time to write a note on the back of the heart, if desired.
Use Removable Glue Dots to adhere your mouse to the top of your valentine.

This is a fun way to create a valentine with a little bit of chocolate on it and a whole lot of cuteness too!
~Dawn

No comments:
Post a Comment